


Hey everybody! I’m working on an animated film about the One Yellow Rabbit performance ensemble called “Renderrabbits”. It’s a series of animated portraits of the Rabbits I am creating using a method called “rotoscoping”. Here’s a definition from Wikipedia:
Rotoscoping is an animation technique in which animators trace over footage, frame by frame, for use in live-action and animated films.[1][2] Originally, recorded live-action film images were projected onto a frosted glass panel and re-drawn by an animator. This projection equipment is called a rotoscope. Although this device was eventually replaced by computers, the process is still referred to as rotoscoping. – https://en.wikipedia.org/wiki/Rotoscoping
In December of 2014 I shot some intimate screen tests of Denise Clarke, Andy Curtis, and Blake Brooker to use as rotoscope material to work with, and I have been going thru the Rabbits’ archives to find shots from their 30+ year history to animate as well. Additionally I have been pulling home movies, YouTube videos, and found footage to get material to create portraits of the late Richard McDowell and Michael Green – I was not able to film my own tests of these artists before they passed away. RIP, dudes. You are certainly missed.
The film is going to premiere as a visual-only installation at the 2016 High Performance Rodeo. In the spring of 2016 I will be working with Calgary artist and musician Kenna Burima to add a soundtrack and turn it into a final film that I hope to send to film festivals around the world. The National Film Board is supporting the project through its Filmmaker Assistance Program. The project was originally started as an exhibition in the Calgary Arts Commons’ Lightbox Studio in January and February 2015.
***
This past week I have been experimenting with a purely digital method of rotoscoping. The animations I made previously for this project were all done directly on paper using a complicated method of projecting still frames onto an animation table in the studio. Tbh I am more comfortable working on my hackintosh at home – I draw faster using a tablet and having an undo button is much more convenient than a dirty eraser smudging up my pages.
There are many dedicated animation programs to use for this work – Toon Boom, TVPaint, Manga Studio, etc. – but I am most comfortable using Photoshop (I know all the keyboard shortcuts already). I created my previous film Renderfriends in Photoshop using a very laborious method, but I have recently been learning to use the Animation/Timeline features to make the process much easier. Video layers, bruh! Plus, the custom brushes you can use in Photoshop blows the other programs out of the water – the quality of line is much more organic, and it’s remarkably easy to simulate natural media, such as watercolors or pencils, without worrying about how the vector algorithms the other programs use will render your drawings.
So this past week I have been working on a digital test of Richard McDowell, from his wedding video to Zadie, to see how the Photoshop animation method would turn out.
Step 01: The Original Video
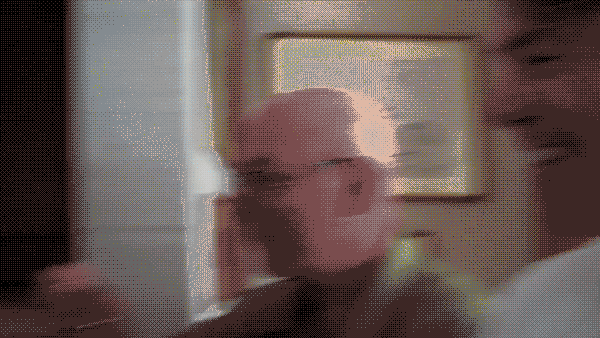
(Note: this is a .GIF, the actual video isn’t this low-res)
I go through the videos and find a 3-10 second clip I want to animate. I look for a clip that shows the “essence” of the Rabbit, preferably them in a candid situation, looking directly at the camera, with some sort of gesture or expression. I then convert the clip in After Effects to the right resolution and frame-rate with which to animate.
Step 02: Rotoscope, 1st pass

Next I import the processed footage into Photoshop and trace the whole video, frame-by-frame, somewhat loosely, to get the quality of the motion and expression. I’m not being that careful about consistency on the 1st pass – look at the hands and arm, how it wiggles around! The inconsistent line-weight! This source video isn’t great quality, there is a lot of camera shake and blurs. I have to decide if I want to roll with it, or interpret the frames to make it clearer. This round I embraced the blurs and camera shake to see what it would look like when played back. What does a camera blur look like when rendered in rough pencil? Sort of like this. That first smear is rough, the end one is way better.
I am finding with this method, there isn’t a 1:1 relationship between the original video and the animation. I have to tweak or massage expressions/movements/etc to make it “read”; each animation requires a certain amount of interpretation on my part. PLUS (and this is a biggie) the frame-rates of the original videos are usually all over the place before I convert them (20fps, 29.95 fps, 23.95 fps converted to 12fps or 24fps), so sometimes there are dropped frames which make the animation look a bit stilted or jerky if I don’t smooth it out.
I’ll watch the loop and look for things to fix in the 2nd pass. Usually the 2nd half of the loop is stronger than the 1st just because I get used to drawing the subject by then, and my hands have warmed up, so going back to the 1st half and cleaning up is necessary anyway.
Step 03: Fix up the animation, 2nd pass

Notice this one doesn’t sync up with the other two? That’s because I added some frames at the beginning to make the first smear a bit smoother. It’s about a 1/3 of a second longer than the original.
So for this pass I clean up any inconsistencies (redraw the hands and arm), fix expressions, completely redraw sloppy frames, redraw the intro smear to make it read more as an animation independent of the source video. Any secondary drawings or animation I draw on the 2nd pass – add the hair, make the liquid in the shotglass more dynamic. I also added some colour on this pass just to see what it would look like.
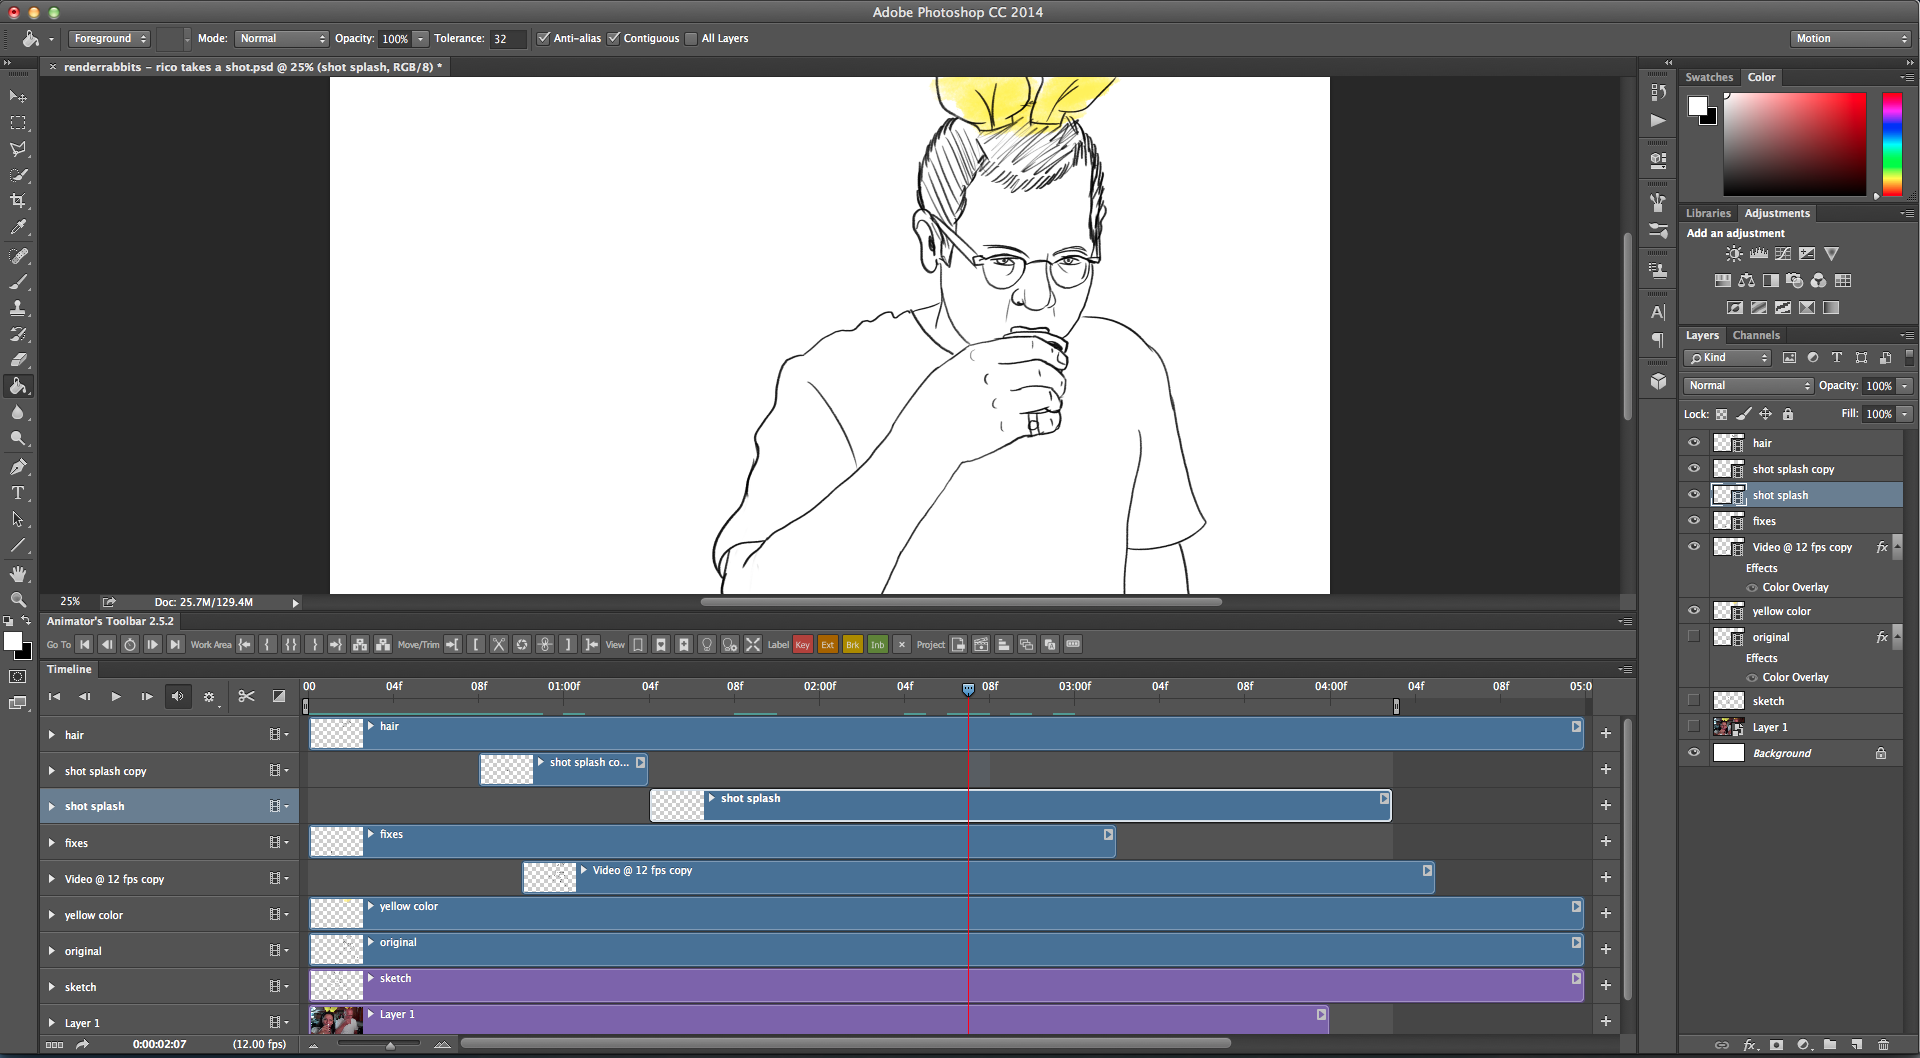
The thing I love about doing this in Photoshop is that I can work with layers. So I can use the first pass, add a “fix” layer on top of it, and selectively erase stuff and add the new drawings on top without having to completely redraw each frame. Or I can add a “color” layer to add the yellow, or add pencil shading, or just work on the liquid in the shotglass, etc. and if I don’t like it I can just turn that layer off, or erase it and start again without deleting the rest of the drawing on that frame.
Here’s a shot of what it looks like working in Photoshop:
Anyway, back to it! I’ll be posting more process shots over the next couple months. Thanks for reading!


